Filming flood fills with ink
Behind the scenes of this flood fill animation
I wanted to give something a bit tangible to the parent article, in this age where you can just generate an animation in about 10 seconds. I agree with this stance on writing by Johanna Larsson and think putting effort in is better for everyone. How hard could it be to create physical graphs to be traversed by liquid ? Well, it wasn’t very hard, but there were a few subtleties that first surprised me, to then feel very logical, remembering the various ways water flows in textiles or shapes.
Of course, we illustrate the graph traversals, but not the self-propagating mechanism of the worm.
I’ve drawn and printed 4 prototypes over two hours : you can see my first overly optimistic attempt with big graphs and deep pools. This one did not work at all, but not only because of the way it was drawn.
There were 4 separate angles to assess :
- Choice of moving mechanism (gravity vs capillarity)
- Liquid formulation
- Surface roughness
- Node type
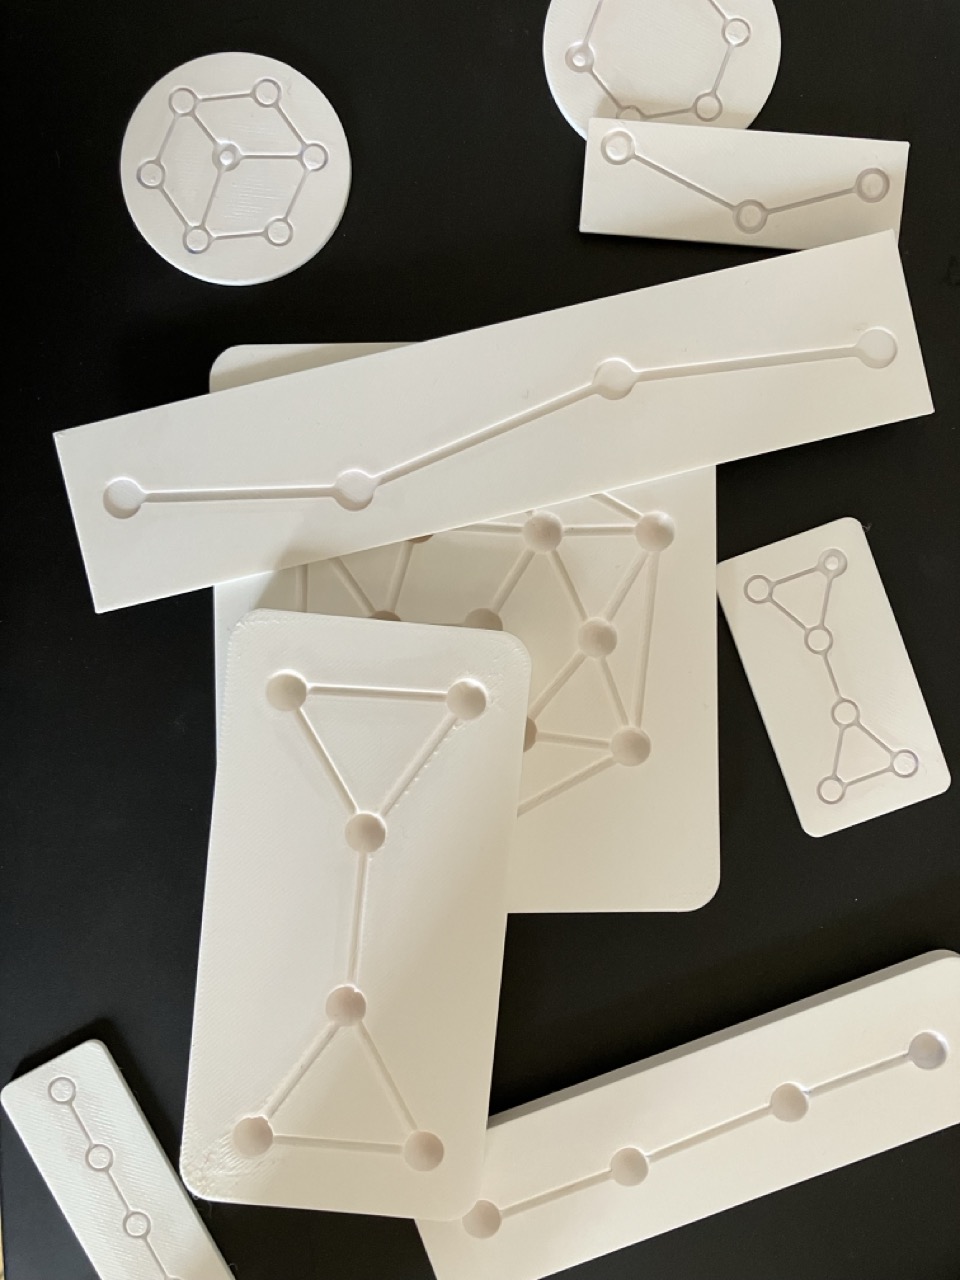
First prototype : wide lines, deep pools
As I wrote above, this one did not work at all. I dug deep spherical pools to have different color densities in the edges and nodes, but water just did not move, except a bit in the edges, and the plastic got tinted quite fast. Surface tension of the water front also prevented it to fall from an edge to a pool, and the roughness of the top surface of the print sometimes prevented it to advance in the edges.
This reminded me of two opposite ways of moving liquids around : gravity (water flows down) and capillarity (surface tension forces move water up or laterally). If I was going for deep pools and big edges, I needed to leverage gravity, which meant organizing my graphs in 3D so there is a slope (a gradient ? how 2026 !) to descend. This meant using more plastic and longer prints. So I settled to not use gravity at all.
To fight roughness and ink stains, I sealed the prints with nitrocellulose varnish, which is a fancier formulation for clear acetone-base nail polish. Nudging the first prototype so water falls on the varnished tracks kind of worked now.
The liquid also evolved from straight ink to ink + water + calcium carbonate (chalk, to give it a slight “milkiness”) + dish soap (which is a surfactant, so it helps overcome surface tension and increases flow a lot).
Second prototype : fixed height, no wells
The second prototype eliminated the pools, but the widening of the channels at the nodes still stopped the liquid. It advanced better in the channels now that they were shallower, and capillarity worked better.
Third prototype : thinner edges, nodes as rings
The third prototype worked almost perfectly, except that water encountered a kind of barrier at the entrance of the nodes. I eliminated them in the 4th and last prototype by rounding the junctions between nodes and edges.
Fourth prototype : optimized ink entries, thinner lines
Progressively reducing the lines made capillarity work better, and I also made the ink entrypoints more generous in space, with a tapered point to guide the droplet. The final design used 0.8mm wide lines.